
Riding for long stretches, while enjoyable in its own way, can be a bit dull to some. Many people, both motorists and motorcyclists, can attribute their more enjoyable journeys to the melodies that often go along with them.
But if you're on a motorcycle, however, enjoying some good music isn't as simple as turning on the radio. This is why technologies such as helmet intercom and speaker systems are available.
So if you're a motorcyclist who would enjoy a good soundtrack to go along with those longer journeys, or would like to have the option of communicating with others while on the road, read the below guide on how you can go about installing an intercom system to your helmet.
What This Article Covers:
How to Install a Motorcycle Helmet Intercom System
Before we get started, you should note that there are many types of motorcycle helmet intercom systems out there. While they may function the same for the most part there could be some slight differences between them.
Keep in mind that this is a guide that maps out the installation process in a broader, general sense. If you’d like a more specific guide to adding Bluetooth to a motorcycle helmet, we’ve got that covered too.
So to make sure that no mistakes are made, use this guide and pay close attention to the specific type of intercom you have, the instructions that may have come along with it, as well as the type of motorcycle helmet you own.
Now then, let's get you started with the first step.
-
Take a Look at The Inside of Your Helmet
Inspect the inside of your helmet to find a suitable place to mount your speakers. The area you choose should be around the same place your ears will be located while you are wearing the helmet.
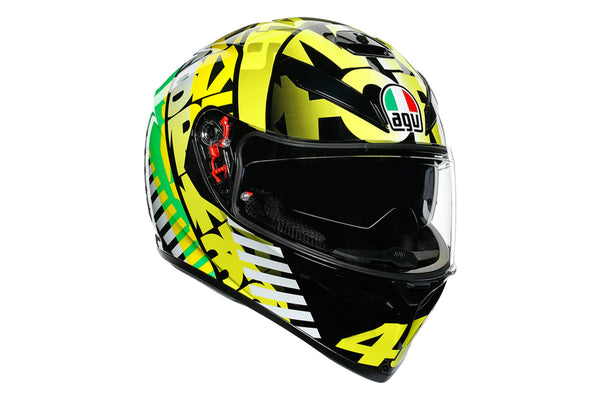
There are different kinds of motorcycle helmets out there and a good number of them are made with helmet speaker systems in mind, such as the AGV K3 SV helmet. These motorcycle helmets will have compartments cut out at your ear level for the sole purpose of mounting speakers.
If the helmet you have doesn’t have these kinds of compartments, then you'll have to cut them out yourself. Keep in mind, though, that doing this to add Bluetooth to your helmet has legal considerations that you need to keep in mind.
-
Remove the Ear and Cheek Pads
The next step is to prep the interior of your motorcycle helmet by removing both the ear and cheek pads from the EPS liner. This makes maneuvering the wires and mounting audio and communication devices easier.
If it gets in the way, you need to remove the chin curtain as well. Be sure to remember where each of the removed parts belongs.
-
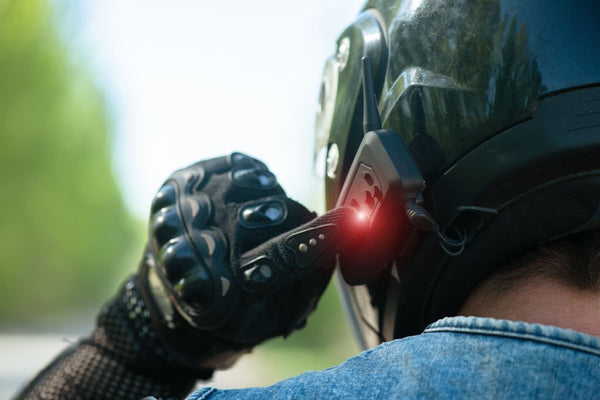
Attach the Intercom Mount on the Outside of the Helmet
Attach the mounting clamp for the intercom system’s main control centre to the outer rim of your motorcycle helmet using either a clamp or by bolting it down.
When you're installing it, be sure that it's clamped or bolted down firmly in place between the outer shell and the interior lining of your helmet in an area that will be easy for you to access even while on the road.
If the design of your helmet makes clamping or bolting it down difficult you have the option of purchasing an adhesive type instead, which will allow you to stick it along the outside of your motorcycle helmet.
-
Install the Speakers

With the interior laid bare and the intercom base clipped in place, you can now install the speakers. If your motorcycle helmet is compatible and has compartments for the speaker already cut out, then you're set. If not, you need to cut out a space for them yourself.
Again, make sure that the area you're cutting the compartments into lines up with where your ears will be.
Depending on the type of helmet intercom system you're working with, you'll need to either attach it using an adhesive or by using a velcro mount with adhesive backing. Each of these comes available with the helmet intercom system in some cases, so it's a good idea to look for one of those if you're planning on purchasing an intercom system.
Once the speakers are in place, you can connect them to the intercom mount if they aren't already.
-
Install the Microphone
After making sure your speakers are secure you can go on to attach the microphone. Once again, there are different ways to go about this. This time it depends on the type of motorcycle helmet you possess.
Luckily, some helmet intercom systems, such as the Sena 20S, come equipped with different types of microphones so you can choose which one works best for your particular helmet model.
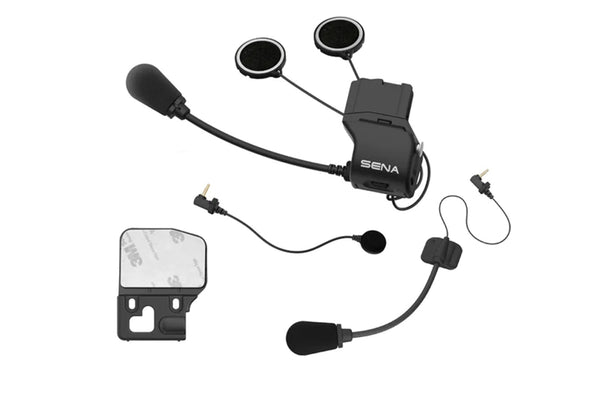
For full-face motorcycle helmets, you'll simply need to attach a wired microphone to the chin bar along the interior rim of the helmet, which can be found in the area behind the cheek pads. Keep it in place using an adhesive or velcro pad. Run the microphone’s wire along the side of the helmet’s interior and behind the cheek pads to keep it hidden and out of the way.
The microphone should be placed on the left side of your face (the wire joining the speakers to the microphone and control centre is usually located on the left speaker) in an area close to your chin.
If you own a modular/open-face motorcycle helmet, I would recommend getting a helmet intercom system that comes equipped with a boom microphone. Attach it to the mounting device that sits on the outside of your helmet, and make sure it's not attached to the part of your helmet that gets lifted.
This allows you to open and close your modular helmet without affecting the positioning of the boom microphone.
-
Place the Main Intercom Device on the Mount
With everything else in its rightful place, your final step is to place the main intercom unit onto the mount. Once it's fully charged and connected to your phone, you are ready to hit the road with your freshly equipped audio and communications system.
While making your own is a great way to go, the best Bluetooth helmets come with an added camera so you can take snaps of the scenery while you ride.
Using a Motorcycle Helmet Speaker System
An onboard motorcycle speaker isn't entirely ideal for enjoying music while on the road. It can get drowned out by the sound of your engine as well as muffled out by your helmet and wind noise.
This is why having a motorcycle helmet that is equipped with an audio and communications system is the best way to enjoy music while riding a motorcycle. It also makes it safe to take directions from a GPS and communicate with others on the road.

Having access to the radio or even your favourite playlist on the road can make a long journey much more enjoyable. Listening to music or your favourite podcast while on the road can even help to keep you more alert during what could be a long, monotonous journey.
At this point, you might be wondering whether or not it's safe to listen to music while riding a motorcycle in the first place. You'd be happy to know that it is, and is permitted by law.
Riding a motorcycle while using audio devices such as noise-cancelling headphones, on the other hand, could land you in some trouble with both the law as well as the unforgiving asphalt.
If you enjoyed this piece, consider checking out other blogs:
- Is It Legal to Wear Earbuds While Riding a Motorcycle?
- How to Listen to Music with a Motorcycle Helmet
- How to Choose a Motorcycle Helmet?
- How Long Do Motorcycle Helmets Last
- How to Check Motorcycle Helmet Expiry Date
- Are MIPS Bike Helmets Safer?
- Best and Safest Motorcycle Helmet
- Are Open-Face Motorcycle Helmets Safe
- Highest Motorcycle Helmet Standard
- Best Motorcycle Helmet
- Best Value Motorcycle Helmet
- Best Lightweight Motorcycle Helmet
- Best Budget Full Face Motorcycle Helmet
- Best Open Face Motorcycle Helmets
- Best Low Profile Motorcycle Helmet